Full Disclosure:
- The guide is copied (many thanks to the creator) but I knew the subject so I decided to translate the article and publish it here
Invision Community goes its own way in many ways... and that's a good thing. However, switching from other forum systems can sometimes be a bit confusing. For example this point, you will probably be used to automatically having a button in the navigation that shows you all registered users on a separate page.
First of all, Invision is much more than "just a forum". You can also use it as a CMS or for ecommerce without having to buy the actual forum module at all and if you run such a site a member list is usually rather unnecessary. However, it already exists, you just have to create the menu item yourself and it works as follows...
Step 1: Make a list

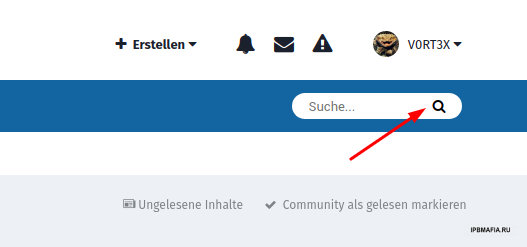
To do this, click once on the icon with the magnifying glass in the header to open the advanced search. There you will find two tabs with which you can select what exactly you want to search, namely the content or the users.
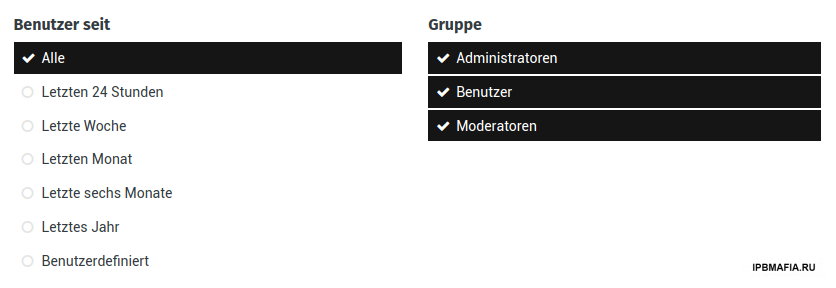
After you have clicked on user search, a few filters are available to you...

Now let's put together our very own list of members, it's actually quite simple:
If you really want to have all registered users at a glance, you can keep these settings as they are. However, you can also display only the newest users via Users since, or only members of one or more user groups.
Here, however, the item "Allow filtering by this group?" to be observed in the AdminCP...

Now you just click on the Search Users button and you already have your list of members 😉
Step 2: Create a button
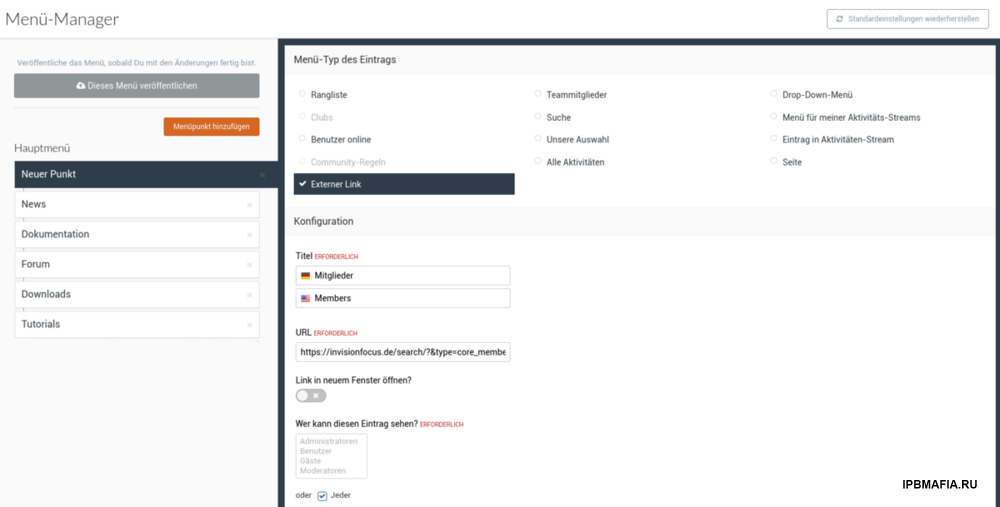
Now we come to the second step, of course you also want to have an entry in the navigation bar to get there directly. To do this, go to the menu manager in the AdminCP under System and click on Add menu item.

There you now select external link, give your button a name and under URL you copy the link of the page you created in step 1 from the browser. Now you can set who is allowed to see the navigation entry (not the page!), click on save and that's almost it.
You can now drag and drop the new entry to where you want it to be displayed later, just don't forget to click on Publish this menu, otherwise your settings will not be saved.
Finally, it only remains to mention that there are at least two applications for membership lists in the Marketplace that do the work for you and offer a few additional features. You can use them to change the layout, for example, or display some additional information about the users in the list. But these are also priced in the USD 10-15 range, if I remember correctly 😉

Recommended Comments
Join the conversation
You can post now and register later. If you have an account, sign in now to post with your account.
Note: Your post will require moderator approval before it will be visible.