
Silence
Актив
-
Регистрация
-
В сети
Everything posted by Silence
-
 Привет ...... замени: core > front > global > navBar все содержание с етим: <ol id="menu"> {template="navBarItems" app="core" group="global" location="front" params="\IPS\core\FrontNavigation::i()->roots( $preview ), \IPS\core\FrontNavigation::i()->subBars( $preview ), 0, $preview"} </ol> core > front > global > navBarltems все содержание с етим: {{foreach $roots as $id => $item}} {{if $preview or $item->canView()}} {{$active = $item->activeOrChildActive();}} {{if $active}} {{\IPS\core\FrontNavigation::i()->activePrimaryNavBar = $item->id;}} {{endif}} <li {{if $active}}class='ipsNavBar_active' data-active{{endif}} id='elNavSecondary_{$item->id}' data-role="navBarItem" data-navApp="{expression="mb_substr( get_class( $item ), 4, mb_strpos( get_class( $item ), '\\', 4 ) - 4 )"}" data-navExt="{expression="mb_substr( get_class( $item ), mb_strrpos( get_class( $item ), '\\' ) + 1 )"}" data-FontAwesome="{$item->title()}"> {{$children = $item->children();}} {{if $children}} <a href="{{if $item->link()}}{$item->link()}{{else}}#{{endif}}" id="elNavigation_{$id}" data-ipsMenu data-ipsMenu-appendTo='#{{if $parent}}elNavSecondary_{$parent}{{else}}elNavSecondary_{$id}{{endif}}' data-ipsMenu-activeClass='ipsNavActive_menu' data-navItem-id="{$item->id}" {{if $active}}data-navDefault{{endif}}> {$item->title()} <i class="fa fa-caret-down"></i> </a> <ul id="elNavigation_{$id}_menu" class="ipsMenu ipsMenu_auto ipsHide"> {template="navBarChildren" app="core" group="global" location="front" params="$children, $preview"} </ul> {{else}} <a href="{{if $item->link()}}{$item->link()}{{else}}#{{endif}}" {{if method_exists( $item, 'target' ) AND $item->target()}}target='{$item->target()}'{{endif}} data-navItem-id="{$item->id}" {{if $active}}data-navDefault{{endif}}> {$item->title()} </a> {{endif}} {{if $subBars && isset( $subBars[ $id ] ) && count( $subBars[ $id ] )}} <ul class='pion' data-role='secondaryNavBar'> {template="navBarItems" app="core" group="global" location="front" params="$subBars[ $id ], NULL, $item->id, $preview"} <li class='ipsHide' id='elNavigationMore_{$id}' data-role='navMore'> <a href='#' data-ipsMenu data-ipsMenu-appendTo='#elNavigationMore_{$id}' id='elNavigationMore_{$id}_dropdown'>{lang="more"} <i class='fa fa-caret-down'></i></a> <ul class='ipsHide ipsMenu ipsMenu_auto' id='elNavigationMore_{$id}_dropdown_menu' data-role='moreDropdown'></ul> </li> </ul> {{endif}} </li> {{endif}} {{endforeach}} в custom.css поставите ето код: #menu { float: right; list-style-type: none; line-height: 1; position: relative; height: 100%; font-size: 14px; font-weight: bold; margin-top: 25px; } #menu:after { content:''; display:block; clear:both; } #menu > li { float:left; padding: 0 2px; } #menu > li.right { float:right; } #menu > li > a { text-decoration: none; text-align: center; color: #fff; display: block; position: relative; padding: 0 25px; line-height: 32px; -moz-border-radius: 2px; -webkit-border-radius: 2px; border-radius: 2px; } #menu > li.active > a{ background-color: #ff7361; font-weight: bold; margin-top: 0; } #menu > li.active:hover > a{ background-color: #ff7361; } #menu > li:hover > a { background-color: #ff7361; } @media screen and (max-width: 979px) { #menu {display:none; } } #menu > li:hover > ul.pion { display:block; } #menu > li > ul.pion { display: none; list-style-type: none; margin: 0; padding: 0; position: absolute; z-index: 2000; width: 200px; background-color: #FFF; -moz-box-shadow: 0 8px 15px rgba(0,0,0,0.1); -webkit-box-shadow: 0 8px 15px rgba(0,0,0,0.1); box-shadow: 0 8px 15px rgba(0,0,0,0.1); } #menu > li > ul.pion > li { position:relative; } #menu > li > ul.pion > li > a { height: inherit; float: inherit; text-align: left; line-height: 35px; display: block; margin: 0!important; padding: 0 15px; z-index: 993; color: #2f3239; font-size: 13px; font-weight: normal; } #menu > li > ul.pion > li:hover { background-color: #ff7361; } измените css background и цвет текста с вашем
 -
-
https://invisionpower.com/files/category/172-commerce/?page=2 там ест все Платежный Шлюз https://invisionpower.com/files/file/7658-robokassa-gateway/ https://invisionpower.com/files/file/7568-wallet-one-payment-gateway-платежный-шлюз-для-единой-кассы/ https://invisionpower.com/files/file/8133-ccbill-payment-gateway/ https://invisionpower.com/files/file/8269-mdmx-gate2shop-payment-gateway/ https://invisionpower.com/files/file/7721-wallet-one-payment-gateway/ https://invisionpower.com/files/file/7999-yandexmoney-payment-gateway/ https://invisionpower.com/files/file/8471-sd-bitcoin-inpaypl-gateway/
-
leaderboard и reputation
-
.cProfileSidebarBlock.ipsLeaderboard_trophy_1 { padding: 10px; background-color: rgba(250,199,70,0.6); color: #704926; } .cProfileRepScore_positive { background: #598f5b; color: #fff; } измените color и background с вашем цвет поставите ваш код в custom.css
-
{{if member.member_posts > 3}} <! - Показывает , если член имеет более 3 сообщений -> {{endif}} {{if member.member_posts < 3}} <! - Показывает , если член имеет меньше 3 сообщений -> {{endif}}
Количество сообщений (p=200) - контент будет доступен всем пользователям, набравшим такое количество сообщений, которое указано в условии.
Просмотр файла Auto-Assign Commerce Support Requests Две основные функции, этот плагин предоставляет следующие: Возможность автоматического назначения новых запросов поддержки к конкретному сотруднику (за отдел), так что они получают ежедневное напоминание назначенных билетов Возможность автоматического электронной почты сотрудника, когда билет на них возложена (включить / отключить в отделе) Этот плагин предоставляется как есть, без какой-либо гарантии или гарантии. Нет поддержки не предусмотрено. Добавил Silence Добавлено 16.05.2017 Категория Интерфейс Язык Язык: eng
Просмотр файла Ignore Extention: Blogs and Galleries Расширяет «Ignore Участник» особенность в блогах и галереи. Протестировано и работает с IPS против 4.1.19. Этот файл предоставляется как есть, и не будет оказываться никакой поддержки. Добавил Silence Добавлено 16.05.2017 Категория Интерфейс Язык Язык: eng
Ок ... Спасибо
ACP > Members > Groups > пример Administrator > edit > Group Formatting : <span style='color:#ff0000'><i class="fa fa-user-circle" aria-hidden="true"></i> Group Name: </span> иконки : http://fontawesome.io/icons/
 Sipsb, можно достать?
я посматрел ваш форум ...... у меня все в порядке не вижу проблем
Sipsb, можно достать?
я посматрел ваш форум ...... у меня все в порядке не вижу проблем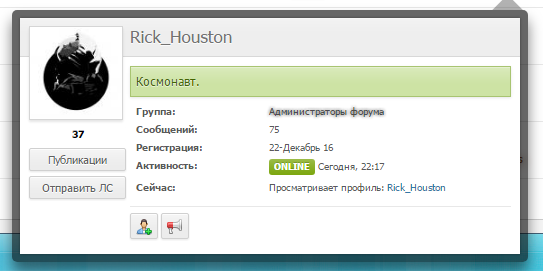
 Две основные функции, этот плагин предоставляет следующие: Возможность автоматического назначения новых запросов поддержки к конкретному сотруднику (за отдел), так что они получают ежедневное напоминание назначенных билетов Возможность автоматического электронной почты сотрудника, когда билет на них возложена (включить / отключить в отделе) Этот плагин предоставляется как есть, без какой-либо гарантии или гарантии. Нет поддержки не предусмотрено.Free
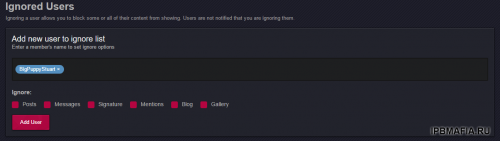 Расширяет «Ignore Участник» особенность в блогах и галереи. Протестировано и работает с IPS против 4.1.19. Этот файл предоставляется как есть, и не будет оказываться никакой поддержки.Free
Чтобы сделать это, откройте Admin CP -> Look & Feel -> Select Template ->Board Index -> boardIndexTemplate Мы находим следующий код: <div id='board_index' class='ipsLayout <if test="sideBarEnabledL:|:$this->templateVars['sidebar_enabled']">ipsLayout_withright</if> ipsLayout_largeright clearfix <if test="sidebarclosed:|:IPSCookie::get('hide_sidebar') == '1'">no_sidebar</if>'> Замените его с этим кодом: <div id='board_index' class='ipsLayout ipsLayout_withleft ipsLayout_largeleft <if test="sideBarEnabledL:|:$this->templateVars['sidebar_enabled']">ipsLayout_withright</if> ipsLayout_largeright clearfix <if test="sidebarclosed:|:IPSCookie::get('hide_sidebar') == '1'">no_sidebar</if>'> Найти: <div id='categories' class='ipsLayout_content clearfix'> Вставьте код выше: <div class='ipsLayout_left clearfix'><div class="ipsSideBlock clearfix"><h3>Название блока</h3><div class='_sbcollapsable'><ul class='ipsList_inline'> <li>Содержание Блоки</li></ul></div></div></div> Вот и все. Код вы можете изменить его в соответствии с вашими пожеланиями. На разрешение экрана, я не сделал едва любые изменения. Только изменилась ширина Форума 1150px 92%. Вот это в моем CSS-а: #wf-container,.wf-width {width:92%;height:auto!important;position:relative;margin: 0 auto;} Вот пример кода: <if test="boardIndexTop:|:true"></if><div id='board_index' class='ipsLayout ipsLayout_withleft ipsLayout_largeleft <if test="sideBarEnabledL:|:$this->templateVars['sidebar_enabled']">ipsLayout_withright</if> ipsLayout_largeright clearfix <if test="sidebarclosed:|:IPSCookie::get('hide_sidebar') == '1'">no_sidebar</if>'><div class="ipsLayout_left clearfix"><div class='ipsSideBlock clearfix'><h3> Онлайн </h3><li<div class='_sbcollapsable'>{$stats['TOTAL']} {$this->lang->words['active_users_text']} <br/><div class='thin'><if test="activeNames:|:count($stats['NAMES'])"><p><span class='name'>{parseexpression="implode( ",</span> <span class='name'>", $stats['NAMES'] )"}</span></p></if></div></div><div class="ipsSideBlock clearfix __xXtwist352statistics"> <h3 id="anonymous_element_36"><a href="#" class="ipsSidebar_trigger ipsType_smaller right desc mod_links">×</a>Статистика</h3> <ul class="ipsList_data sb_statistics clearfix"> <li class="clearfix"> <span class="sl">Mнения:</span> <span class="sr"><b>{$stats['info']['total_posts']}</b></span> </li><li class="clearfix"> <span class="sl">Потребители:</span> <span class="sr"><b>{$stats['info']['mem_count']}</b></span> </li><li class="clearfix"> <span class="sl">Най-нов потребител:</span> <span class="sr"><b>{IPSMember::makeProfileLink( $stats['info']['last_mem_name'], $stats['info']['last_mem_id'], $stats['info']['last_mem_seo'], 'value' )}</b></span> </li> <li class="clearfix" data-tooltip='{$stats['info']['most_time']}' id="anonymous_element_37"> <span class="sl">Най-много онлайн:</span> <span class="sr"><b>{$stats['info']['most_online']}</b></span> </li> </ul></div><h3 class="maintitle" style=""><strong>Приятели</strong></h3><div class="_sbcollapsable"><b><a href="http://www.test/" target="_blank">Test1</a> | <a href="http://test.net/" target="_blank">Без Думи</a> | <a href="http://test.com/" target="_blank">Invisionbg</a> | <a href="http://test.com/" target="_blank">Test</a> | <a href="http://test.bg/" target="_blank">Bglessons</a> | <a href="http://www.testu.net/" target="_blank">Tishu</a> | <a href="http://test.to/" target="_blank">Sharevideo</a> | <a href="http://psbulgaria.com/" target="_blank">PSBulgaria</a> | <a href="http://test.com/" target="_blank">CMS Revue</a></b></div></li></div><div id='categories' class='ipsLayout_content clearfix'>
Перейти к ACP > Customizations > Themes > ваша тема > edit HTML and CSS > core > global > forms > editorAttachments и заменит все содержание с ето:
Можно скрийншот ....... не панимаю
{{if in_array( \IPS\Member::loggedIn()->member_group_id, array( 2, 4, 6 ) )}} Это содержание показывает только членам в группах с ID 2, 4 или 6. {{endif}}
{{if \IPS\Member::loggedIn()->member_group_id === 4}} Это содержание показывает только членам в группе "Администраторы" (ID 4 в нашем примере) {{endif}}
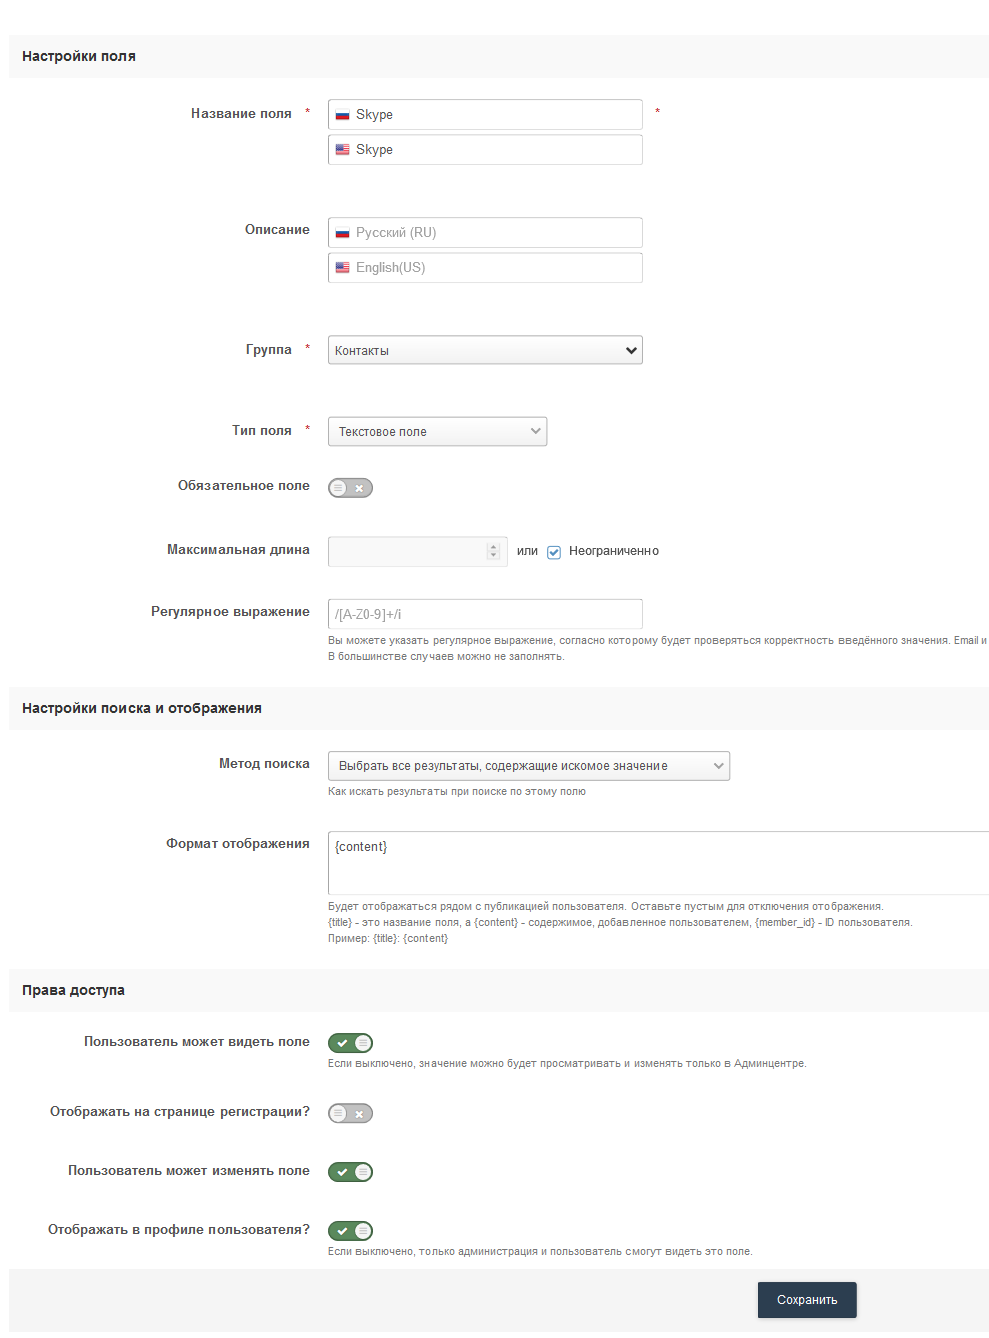
{{if $comment->author()->contentProfileFields()['core_pfieldgroups_1'][10]}} код {{endif}} изменит ид 1 и 10 1= profile field id group 10 = profile field id ACP -> Пользователи -> Настройка -> Профили пользователей -> Создать В группе контакты создаем поля: Skype
Расширяет «Ignore Участник» особенность в блогах и галереи. Протестировано и работает с IPS против 4.1.19. Этот файл предоставляется как есть, и не будет оказываться никакой поддержки.Free
Чтобы сделать это, откройте Admin CP -> Look & Feel -> Select Template ->Board Index -> boardIndexTemplate Мы находим следующий код: <div id='board_index' class='ipsLayout <if test="sideBarEnabledL:|:$this->templateVars['sidebar_enabled']">ipsLayout_withright</if> ipsLayout_largeright clearfix <if test="sidebarclosed:|:IPSCookie::get('hide_sidebar') == '1'">no_sidebar</if>'> Замените его с этим кодом: <div id='board_index' class='ipsLayout ipsLayout_withleft ipsLayout_largeleft <if test="sideBarEnabledL:|:$this->templateVars['sidebar_enabled']">ipsLayout_withright</if> ipsLayout_largeright clearfix <if test="sidebarclosed:|:IPSCookie::get('hide_sidebar') == '1'">no_sidebar</if>'> Найти: <div id='categories' class='ipsLayout_content clearfix'> Вставьте код выше: <div class='ipsLayout_left clearfix'><div class="ipsSideBlock clearfix"><h3>Название блока</h3><div class='_sbcollapsable'><ul class='ipsList_inline'> <li>Содержание Блоки</li></ul></div></div></div> Вот и все. Код вы можете изменить его в соответствии с вашими пожеланиями. На разрешение экрана, я не сделал едва любые изменения. Только изменилась ширина Форума 1150px 92%. Вот это в моем CSS-а: #wf-container,.wf-width {width:92%;height:auto!important;position:relative;margin: 0 auto;} Вот пример кода: <if test="boardIndexTop:|:true"></if><div id='board_index' class='ipsLayout ipsLayout_withleft ipsLayout_largeleft <if test="sideBarEnabledL:|:$this->templateVars['sidebar_enabled']">ipsLayout_withright</if> ipsLayout_largeright clearfix <if test="sidebarclosed:|:IPSCookie::get('hide_sidebar') == '1'">no_sidebar</if>'><div class="ipsLayout_left clearfix"><div class='ipsSideBlock clearfix'><h3> Онлайн </h3><li<div class='_sbcollapsable'>{$stats['TOTAL']} {$this->lang->words['active_users_text']} <br/><div class='thin'><if test="activeNames:|:count($stats['NAMES'])"><p><span class='name'>{parseexpression="implode( ",</span> <span class='name'>", $stats['NAMES'] )"}</span></p></if></div></div><div class="ipsSideBlock clearfix __xXtwist352statistics"> <h3 id="anonymous_element_36"><a href="#" class="ipsSidebar_trigger ipsType_smaller right desc mod_links">×</a>Статистика</h3> <ul class="ipsList_data sb_statistics clearfix"> <li class="clearfix"> <span class="sl">Mнения:</span> <span class="sr"><b>{$stats['info']['total_posts']}</b></span> </li><li class="clearfix"> <span class="sl">Потребители:</span> <span class="sr"><b>{$stats['info']['mem_count']}</b></span> </li><li class="clearfix"> <span class="sl">Най-нов потребител:</span> <span class="sr"><b>{IPSMember::makeProfileLink( $stats['info']['last_mem_name'], $stats['info']['last_mem_id'], $stats['info']['last_mem_seo'], 'value' )}</b></span> </li> <li class="clearfix" data-tooltip='{$stats['info']['most_time']}' id="anonymous_element_37"> <span class="sl">Най-много онлайн:</span> <span class="sr"><b>{$stats['info']['most_online']}</b></span> </li> </ul></div><h3 class="maintitle" style=""><strong>Приятели</strong></h3><div class="_sbcollapsable"><b><a href="http://www.test/" target="_blank">Test1</a> | <a href="http://test.net/" target="_blank">Без Думи</a> | <a href="http://test.com/" target="_blank">Invisionbg</a> | <a href="http://test.com/" target="_blank">Test</a> | <a href="http://test.bg/" target="_blank">Bglessons</a> | <a href="http://www.testu.net/" target="_blank">Tishu</a> | <a href="http://test.to/" target="_blank">Sharevideo</a> | <a href="http://psbulgaria.com/" target="_blank">PSBulgaria</a> | <a href="http://test.com/" target="_blank">CMS Revue</a></b></div></li></div><div id='categories' class='ipsLayout_content clearfix'>
Перейти к ACP > Customizations > Themes > ваша тема > edit HTML and CSS > core > global > forms > editorAttachments и заменит все содержание с ето:
Можно скрийншот ....... не панимаю
{{if in_array( \IPS\Member::loggedIn()->member_group_id, array( 2, 4, 6 ) )}} Это содержание показывает только членам в группах с ID 2, 4 или 6. {{endif}}
{{if \IPS\Member::loggedIn()->member_group_id === 4}} Это содержание показывает только членам в группе "Администраторы" (ID 4 в нашем примере) {{endif}}
{{if $comment->author()->contentProfileFields()['core_pfieldgroups_1'][10]}} код {{endif}} изменит ид 1 и 10 1= profile field id group 10 = profile field id ACP -> Пользователи -> Настройка -> Профили пользователей -> Создать В группе контакты создаем поля: Skype Указат ваш сайт в профиле
{{$skype = preg_replace('/<wbr>/', '', $comment->author()->contentProfileFields()['core_pfieldgroups_1'][10]);}} {{if $comment->author()->contentProfileFields()['core_pfieldgroups_1'][10]}} <a href="skype:{$skype}?chat" target="_blank" class="ipsButton_secondary ipsType_smaller"><img style="width:20px;" src='{resource="skype.png" app="core" location="global"}'></a> {{else}} <a style="opacity:0.2" target="_blank" class="ipsButton_secondary ipsType_smaller"><img style="width:20px;" src='{resource="skype.png" app="core" location="global"}'></a> {{endif}}
Нужно будеш клиент ....
Указат ваш сайт в профиле
{{$skype = preg_replace('/<wbr>/', '', $comment->author()->contentProfileFields()['core_pfieldgroups_1'][10]);}} {{if $comment->author()->contentProfileFields()['core_pfieldgroups_1'][10]}} <a href="skype:{$skype}?chat" target="_blank" class="ipsButton_secondary ipsType_smaller"><img style="width:20px;" src='{resource="skype.png" app="core" location="global"}'></a> {{else}} <a style="opacity:0.2" target="_blank" class="ipsButton_secondary ipsType_smaller"><img style="width:20px;" src='{resource="skype.png" app="core" location="global"}'></a> {{endif}}
Нужно будеш клиент ....